

Hi.
Step 1 Download & Install Java
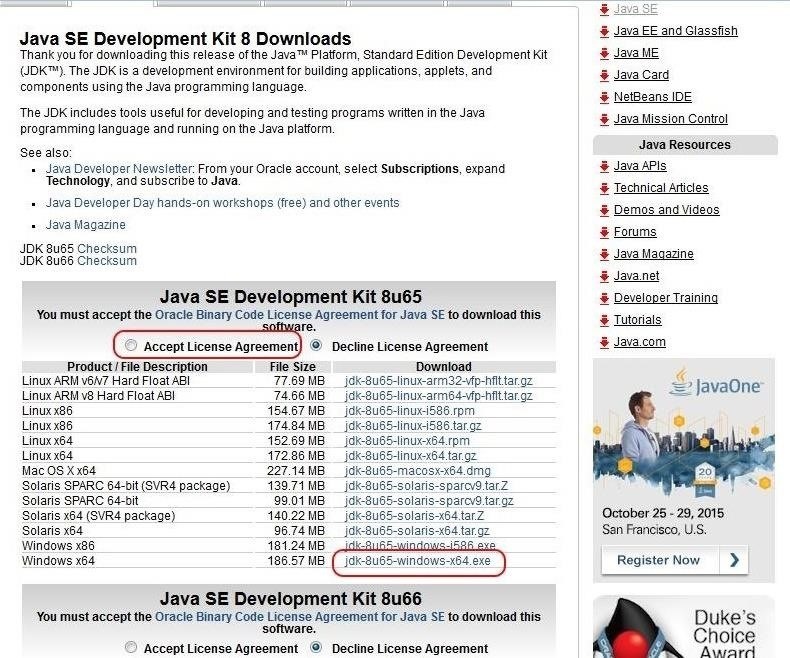
The first step, of course, is to download and install Exploit Pack. As I mentioned above, it is written in Java, so it is requisite that you have Java 8 installed. You can go to Oracle's website and download Java 8 for your architecture. Since I will be working on a 64-bit Windows 7 system, I downloaded the Windows x64 Java, as circled in the screenshot below.
Of course, if you are using a different architecture, make certain to download the Java specific to your architecture. Please note that before downloading it, you must accept the license agreement, and you need to have a free account with Oracle, as well.
Next, go ahead and install Java on your system after downloading it.
Step 2 Download & Install Exploit Pack
Now, we can download and install Exploit Pack from the Exploit Pack website. Note that the MD5 hash is next to each of the downloads. It is a good practice to check to see if the MD5 of the downloaded code matches this MD5 to make certain that the code was not corrupted or otherwise altered.
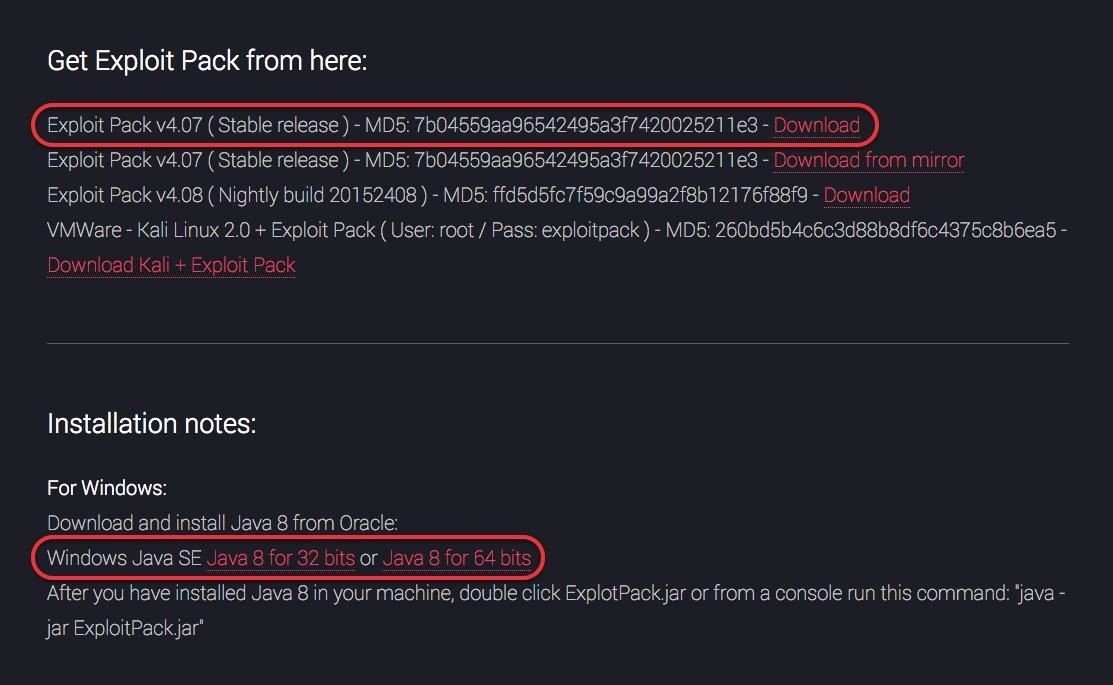
For those of you who want to use Exploit Pack with Kali Linux as a VMware virtual machine, note that Exploit Pack is available with Kali 2.0 as a VMware image (the last of the download choices).
Step 3 Start Exploit Pack
Once you have completed the Exploit Pack download, go to the directory you installed in. In my case, I created a directory named "Exploit Pack" and extracted all the components there.
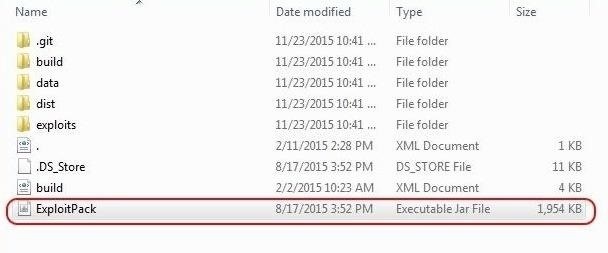
When you go to the directory with Exploit Pack, look for the executable .jar file as I circled above. Click on it and it will begin to open Exploit Pack.
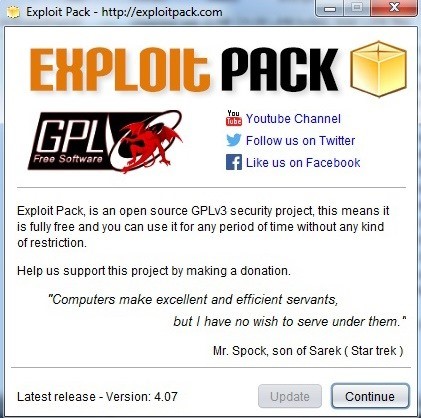
Click on "Continue" when this you see this splash screen to open the Exploit Pack GUI.
Step 4The Exploit Pack GUI
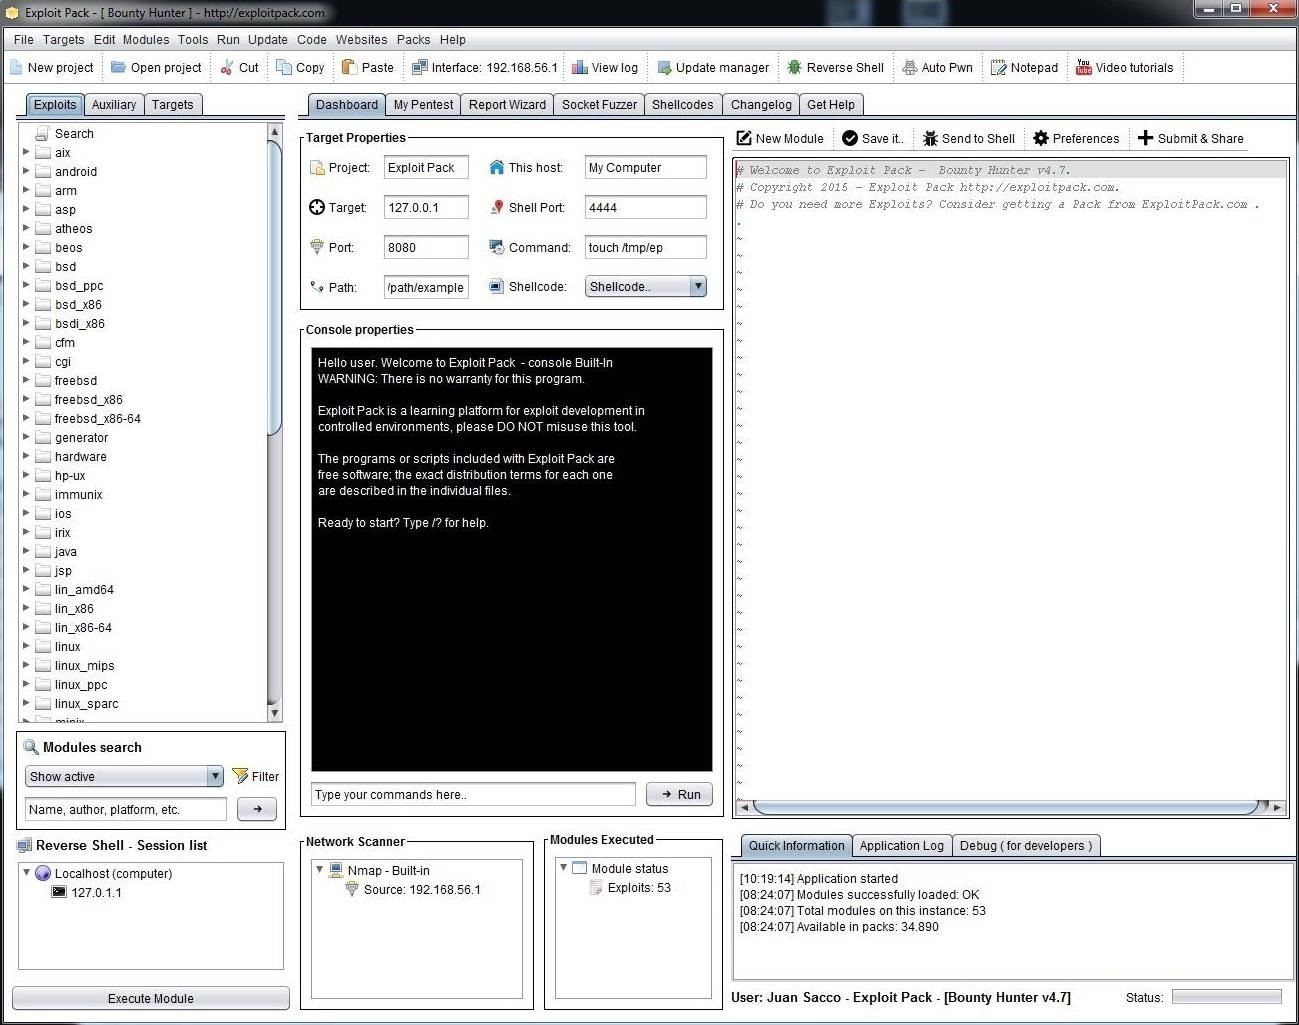
When Exploit Pack is done executing, you should be greeted by a user friendly GUI like that below. For those that more comfortable with "point and click" rather than the command line of Linux, you should find this interface intuitive and familiar, I hope.
Step 5 Explore the Interface
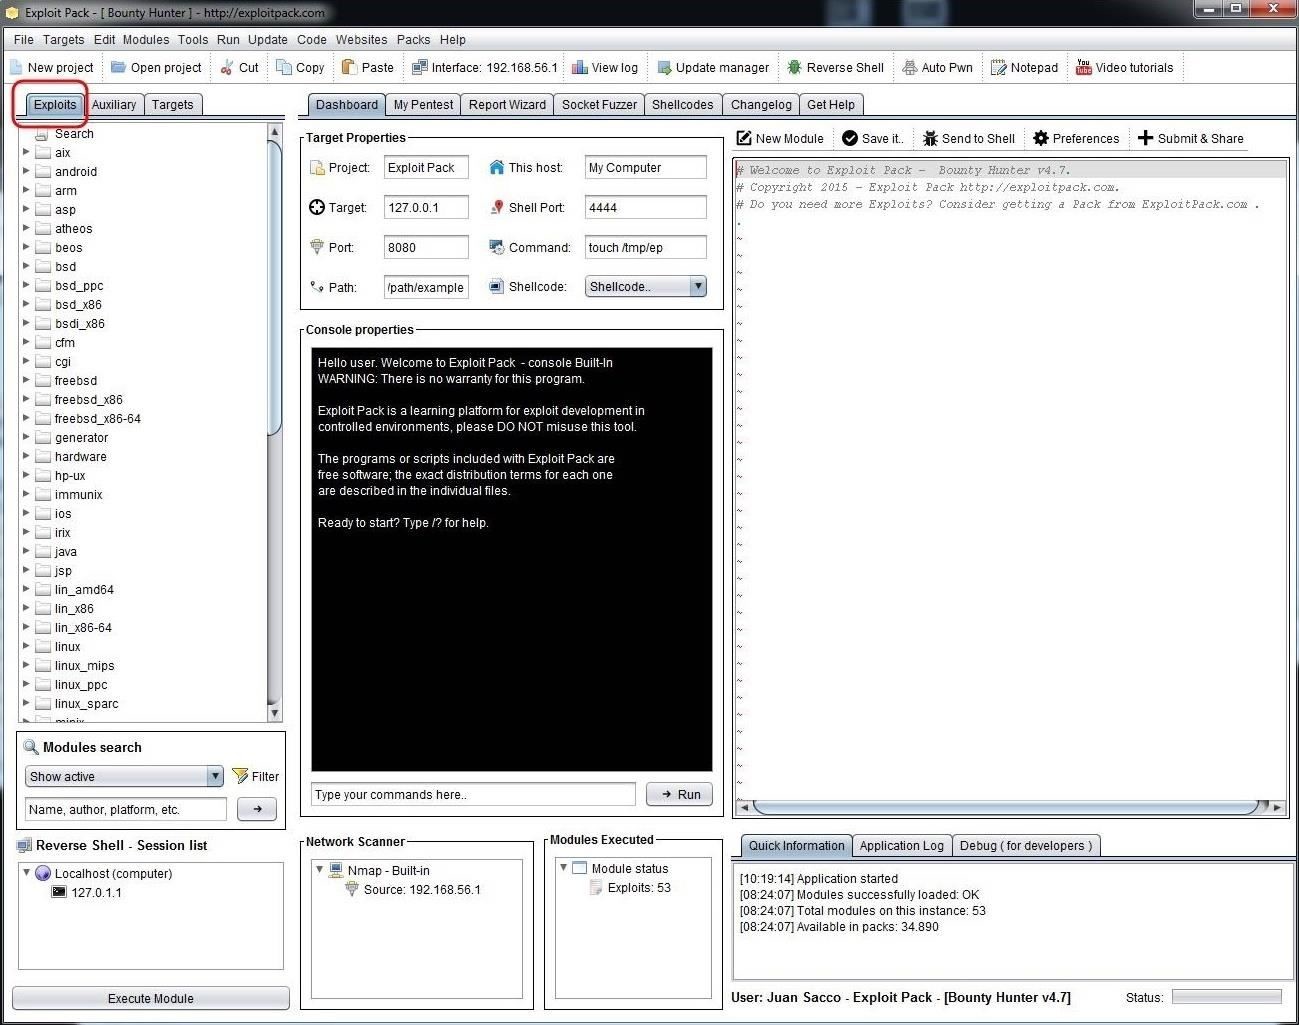
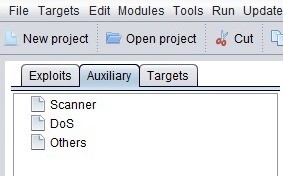
Exploit Pack has a clean and easy-to-use interface. As you can see, if you go to the far left window, we can see three tabs, Exploits, Auxiliary and Target. If we click on Exploits, it brings up a long list of exploit categories, primarily classified by the target operating system (although there some some non-OS categories such as cgi, etc.).
If we scroll down that list a bit, we will find the Windows exploits. Click and expand that list and it reveals a long list of Windows exploits that we might use to hack Windows systems. We will be using some of those in future tutorials.
We can search for modules by going to the "Module Search" box beneath the Exploit window, as seen below.

In the Module Search window, we can choose to show active, recent, or everything, as well as search by name, author, or platform.
Step 1 Download & Install Java
The first step, of course, is to download and install Exploit Pack. As I mentioned above, it is written in Java, so it is requisite that you have Java 8 installed. You can go to Oracle's website and download Java 8 for your architecture. Since I will be working on a 64-bit Windows 7 system, I downloaded the Windows x64 Java, as circled in the screenshot below.
Of course, if you are using a different architecture, make certain to download the Java specific to your architecture. Please note that before downloading it, you must accept the license agreement, and you need to have a free account with Oracle, as well.
Next, go ahead and install Java on your system after downloading it.
Step 2 Download & Install Exploit Pack
Now, we can download and install Exploit Pack from the Exploit Pack website. Note that the MD5 hash is next to each of the downloads. It is a good practice to check to see if the MD5 of the downloaded code matches this MD5 to make certain that the code was not corrupted or otherwise altered.
For those of you who want to use Exploit Pack with Kali Linux as a VMware virtual machine, note that Exploit Pack is available with Kali 2.0 as a VMware image (the last of the download choices).
Step 3 Start Exploit Pack
Once you have completed the Exploit Pack download, go to the directory you installed in. In my case, I created a directory named "Exploit Pack" and extracted all the components there.
When you go to the directory with Exploit Pack, look for the executable .jar file as I circled above. Click on it and it will begin to open Exploit Pack.
Click on "Continue" when this you see this splash screen to open the Exploit Pack GUI.
Step 4The Exploit Pack GUI
When Exploit Pack is done executing, you should be greeted by a user friendly GUI like that below. For those that more comfortable with "point and click" rather than the command line of Linux, you should find this interface intuitive and familiar, I hope.
Step 5 Explore the Interface
Exploit Pack has a clean and easy-to-use interface. As you can see, if you go to the far left window, we can see three tabs, Exploits, Auxiliary and Target. If we click on Exploits, it brings up a long list of exploit categories, primarily classified by the target operating system (although there some some non-OS categories such as cgi, etc.).
If we scroll down that list a bit, we will find the Windows exploits. Click and expand that list and it reveals a long list of Windows exploits that we might use to hack Windows systems. We will be using some of those in future tutorials.
We can search for modules by going to the "Module Search" box beneath the Exploit window, as seen below.
In the Module Search window, we can choose to show active, recent, or everything, as well as search by name, author, or platform.

